Parameter Link
Parameter Link allows you to create links between parameters, whether Type or Instance, in elements filtered by Disciplines and Categories.
Core Features
- Parameter Link allows you to create links between parameters.
- Filter Parameters by Discipline and Categories.
- Add Custom Field and Custom Separator to customize the values of the linked parameters.
- Apply Link to the Whole Model, the Active View or Current Element Selected.
- Save Parameter Link profile.
Table of contents
Add Link
To get started, click on the Add link button to select the Parameters that will be linked and customize the additional settings.
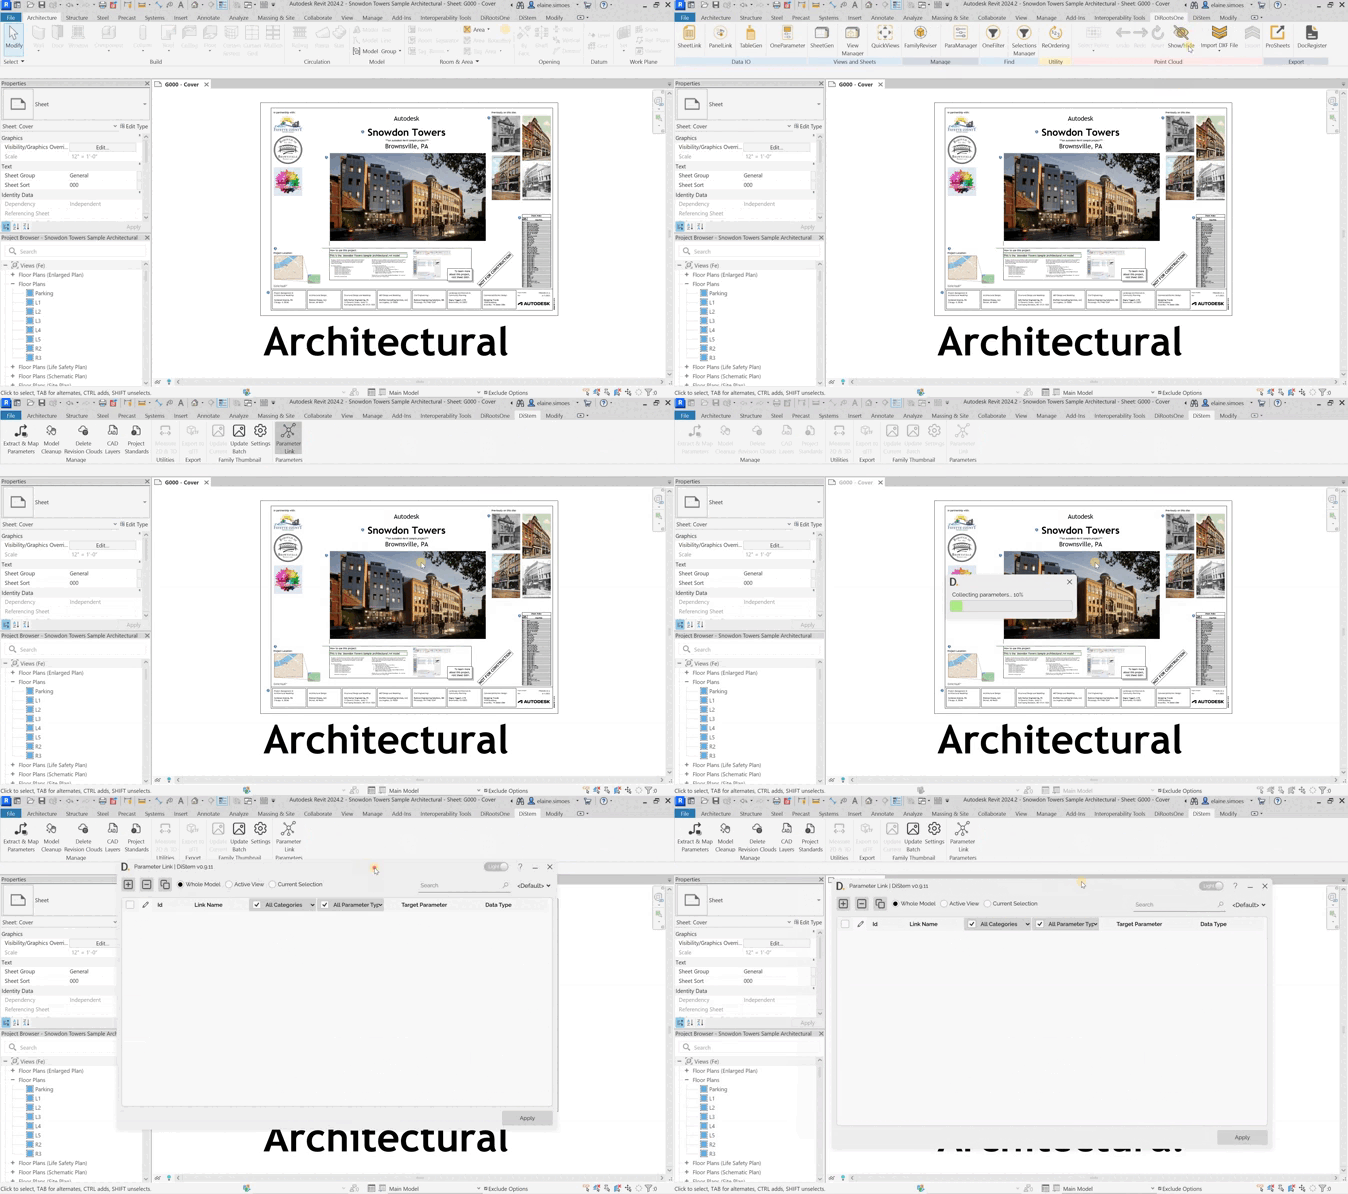
Note: the version on the image may not reflect the latest version.
Firts steps:
-
Enter a custom Link Name or keep the default.
-
In the first dropdown list, select link Type or Instance Parameters.
-
In the second dropdown list, select the Discipline to filter elements.
-
In the last dropdown list, select the element Category.
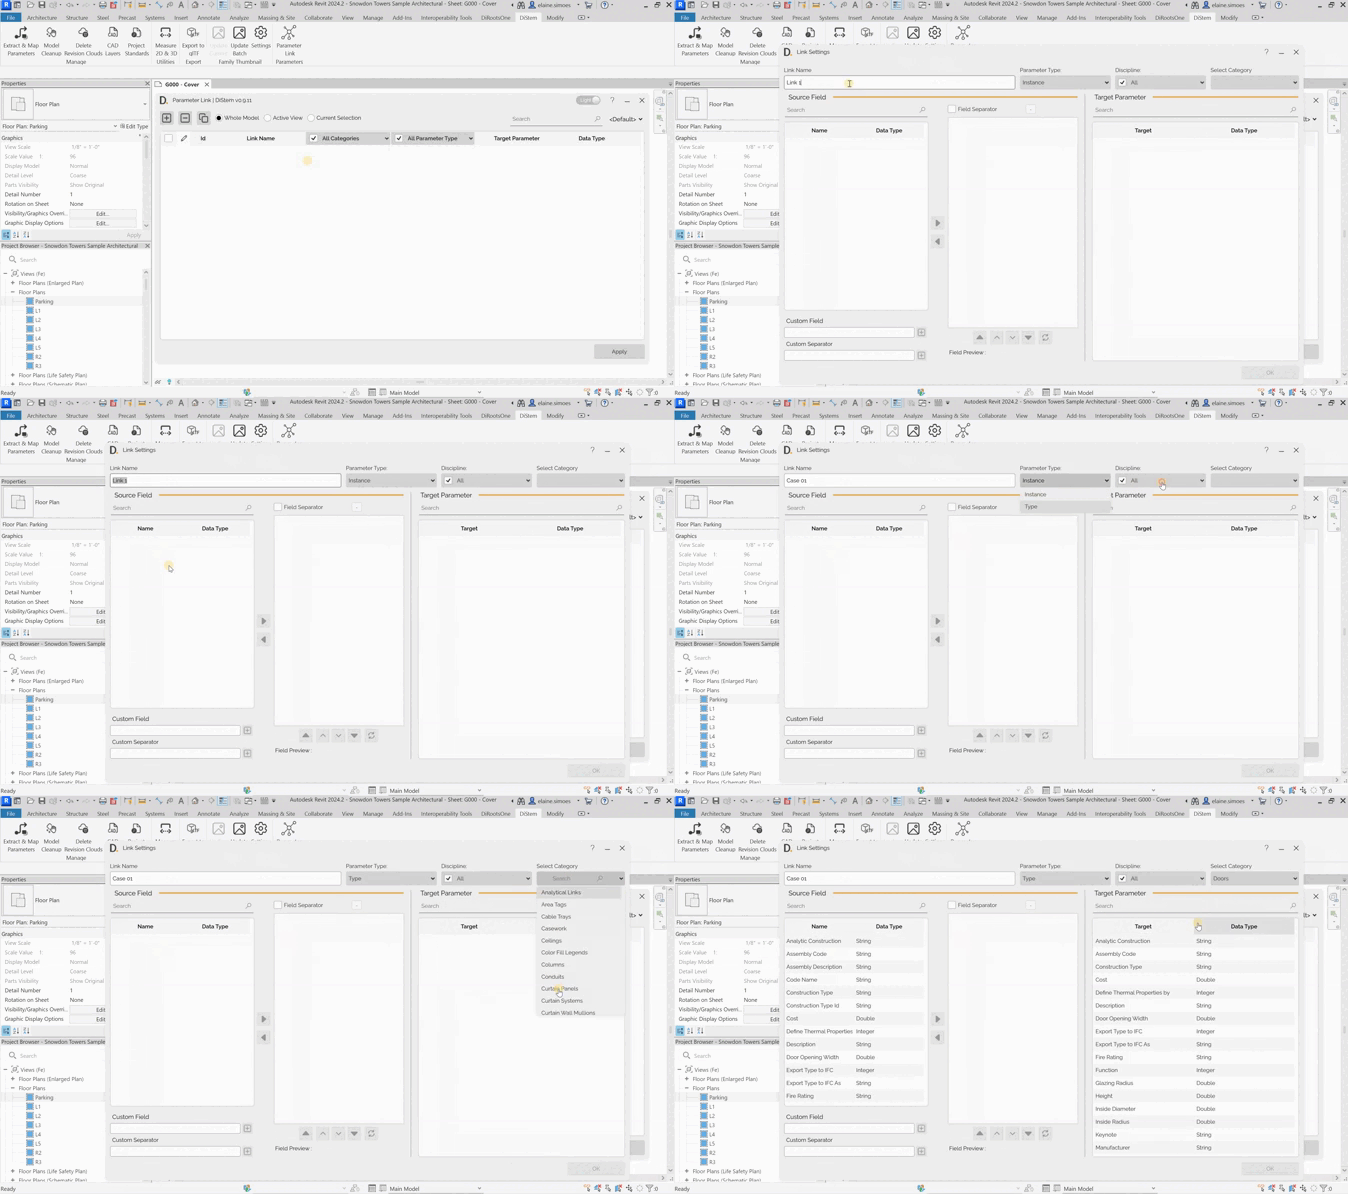
Note: the version on the image may not reflect the latest version.
Next steps:
Source Field
In the firts table, choose the Source Parameters and use the arrows or double-click to add to the the Selected Parameters table.
- Use the Searchbox to find Parameters.
- Add Cutom Field and Custom Separator to compose the values of the linked parameters.
- Active the default Field Separator to add between the parameter values.
#Note:
- User are able to select multiple Source Parameters.
- Note that a preview of the composition of the parameter values is shown below the table of selected parameters.
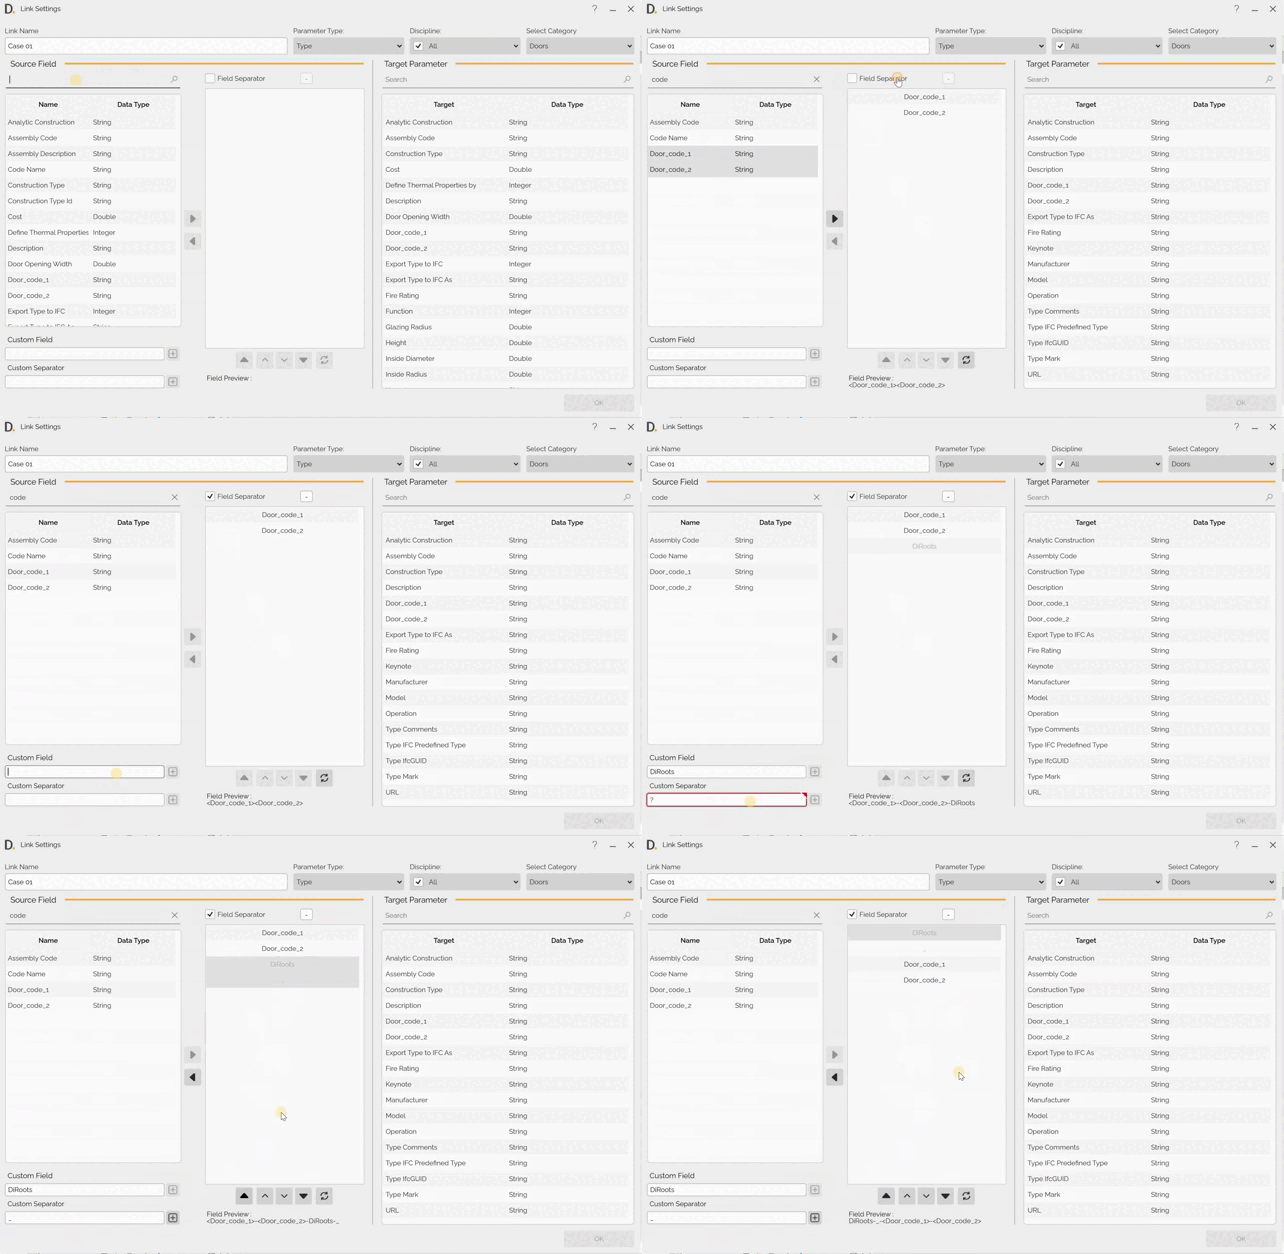
Note: the version on the image may not reflect the latest version.
Target Parameter
Select the target Parameter to link to. You can use the searchbar to find the Parameter you want.
#Note:
User are able to select only one Target Parameter.
All done, now click OK to finish creating the Parameter Link.
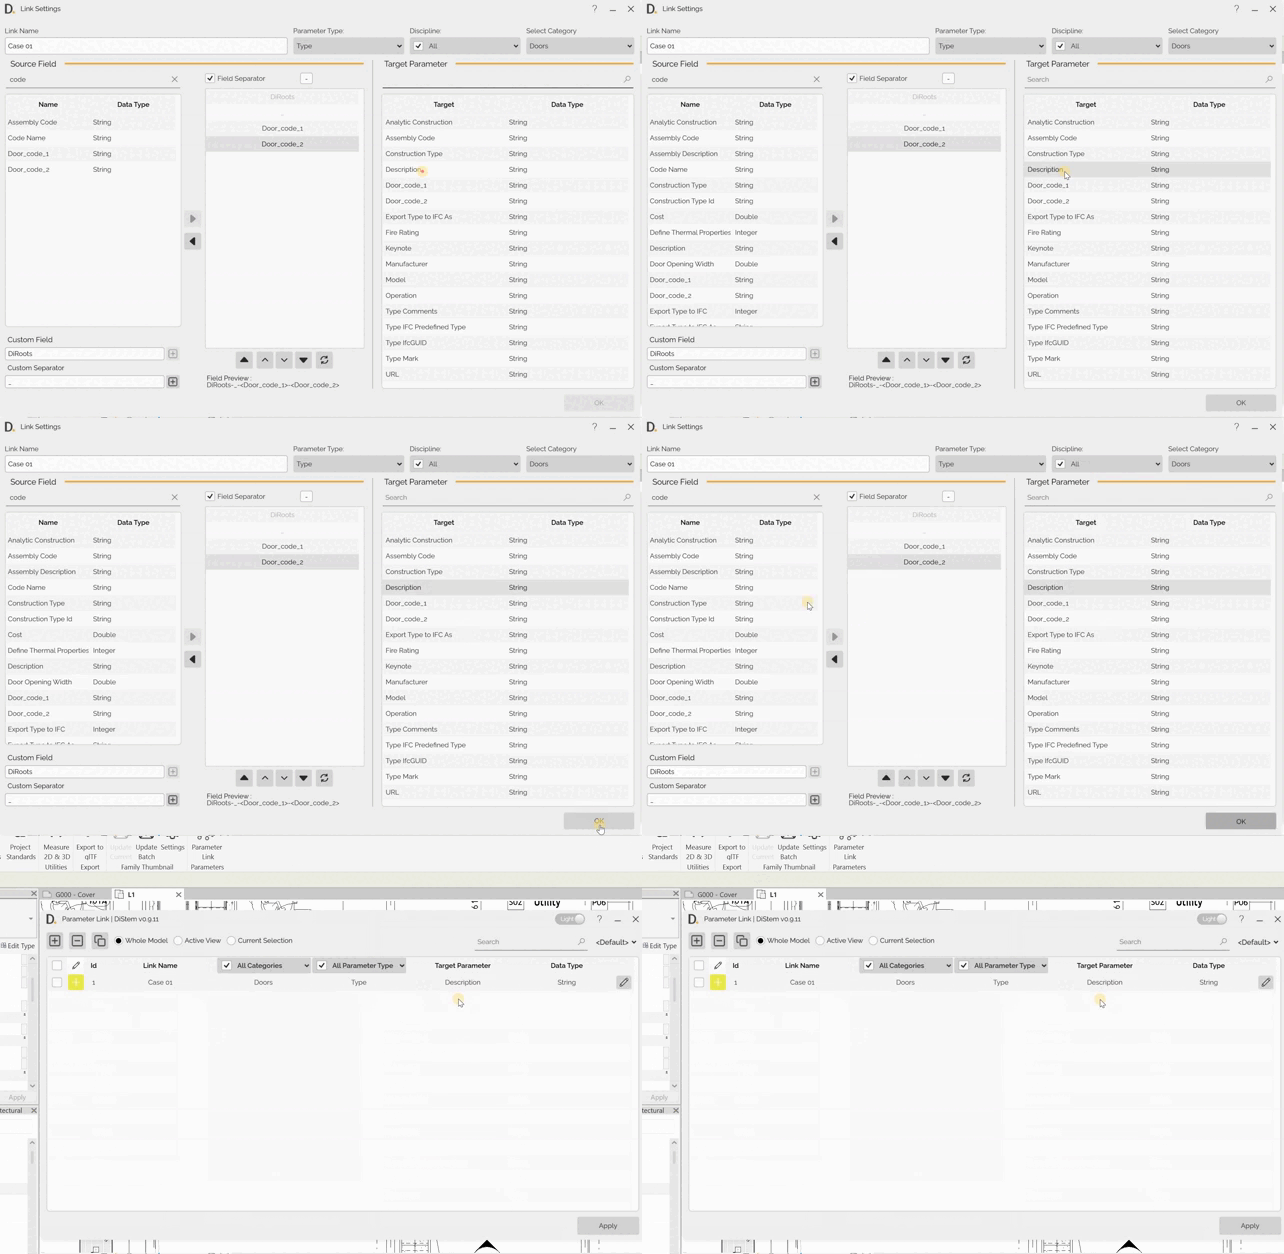
Note: the version on the image may not reflect the latest version.
Delete Link
Select the links you have created and click the Delete Link button, or right-click and select the Delete Link option.
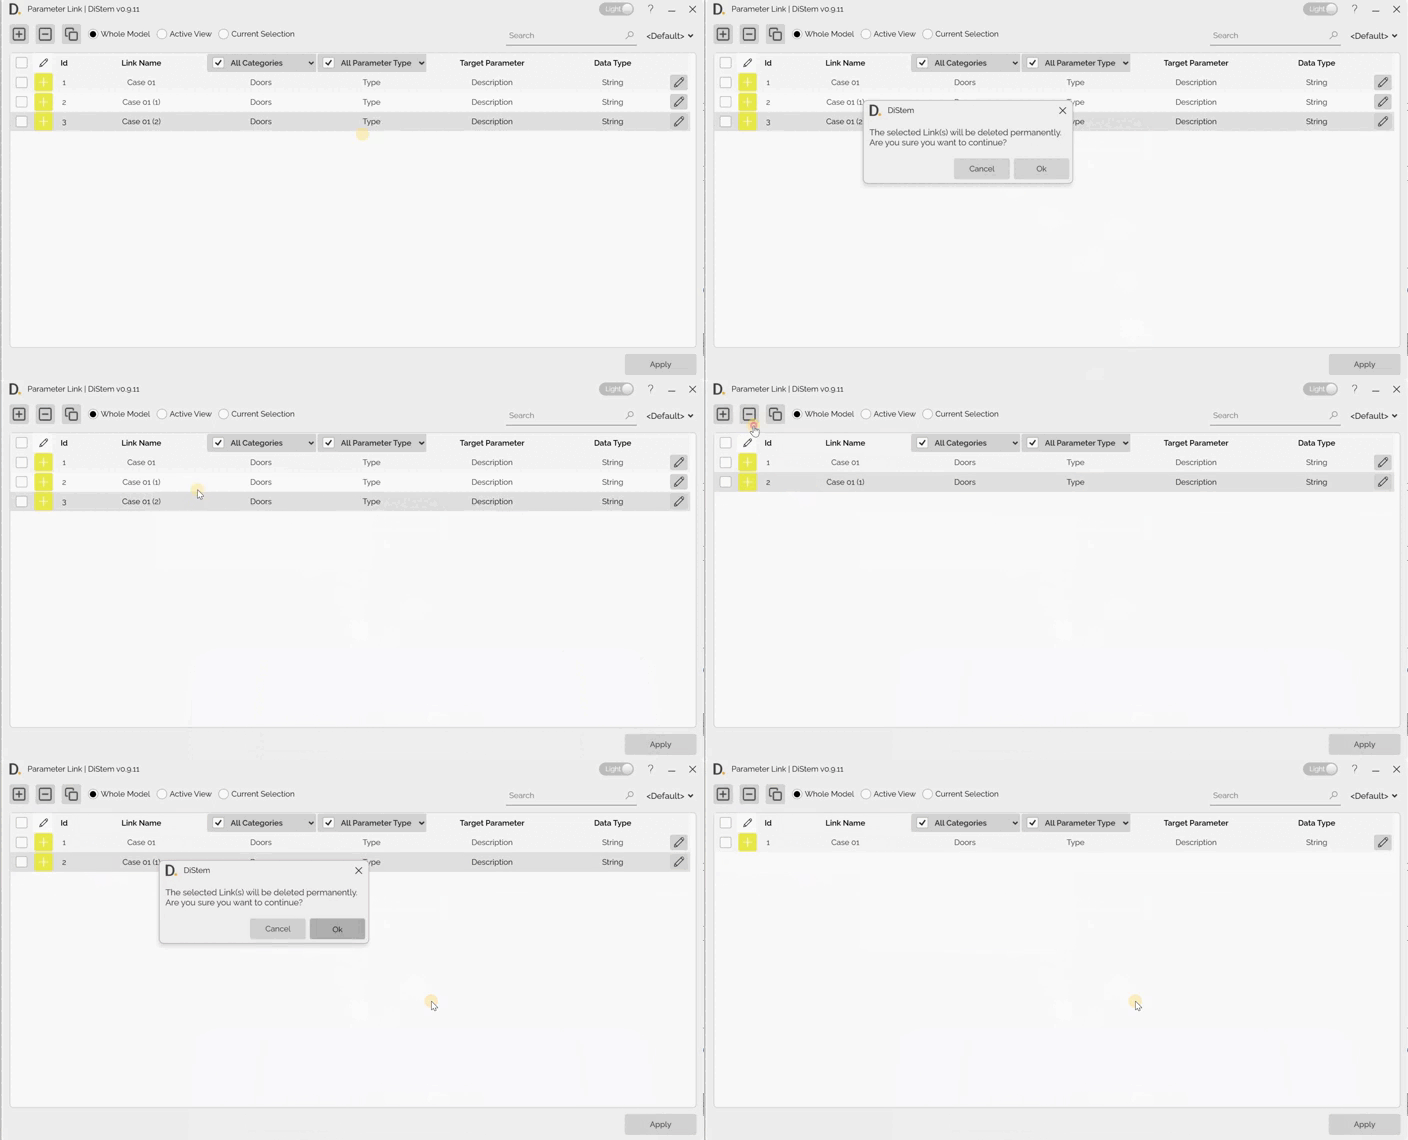
Note: the version on the image may not reflect the latest version.
Duplicate Link
Select the links you have created and click the Duplicate Link button, or right-click and select the Duplicate Link option. Once the Link has been duplicated, click on the Edit button in the last column of the Link to edit the Link settings if you wish.
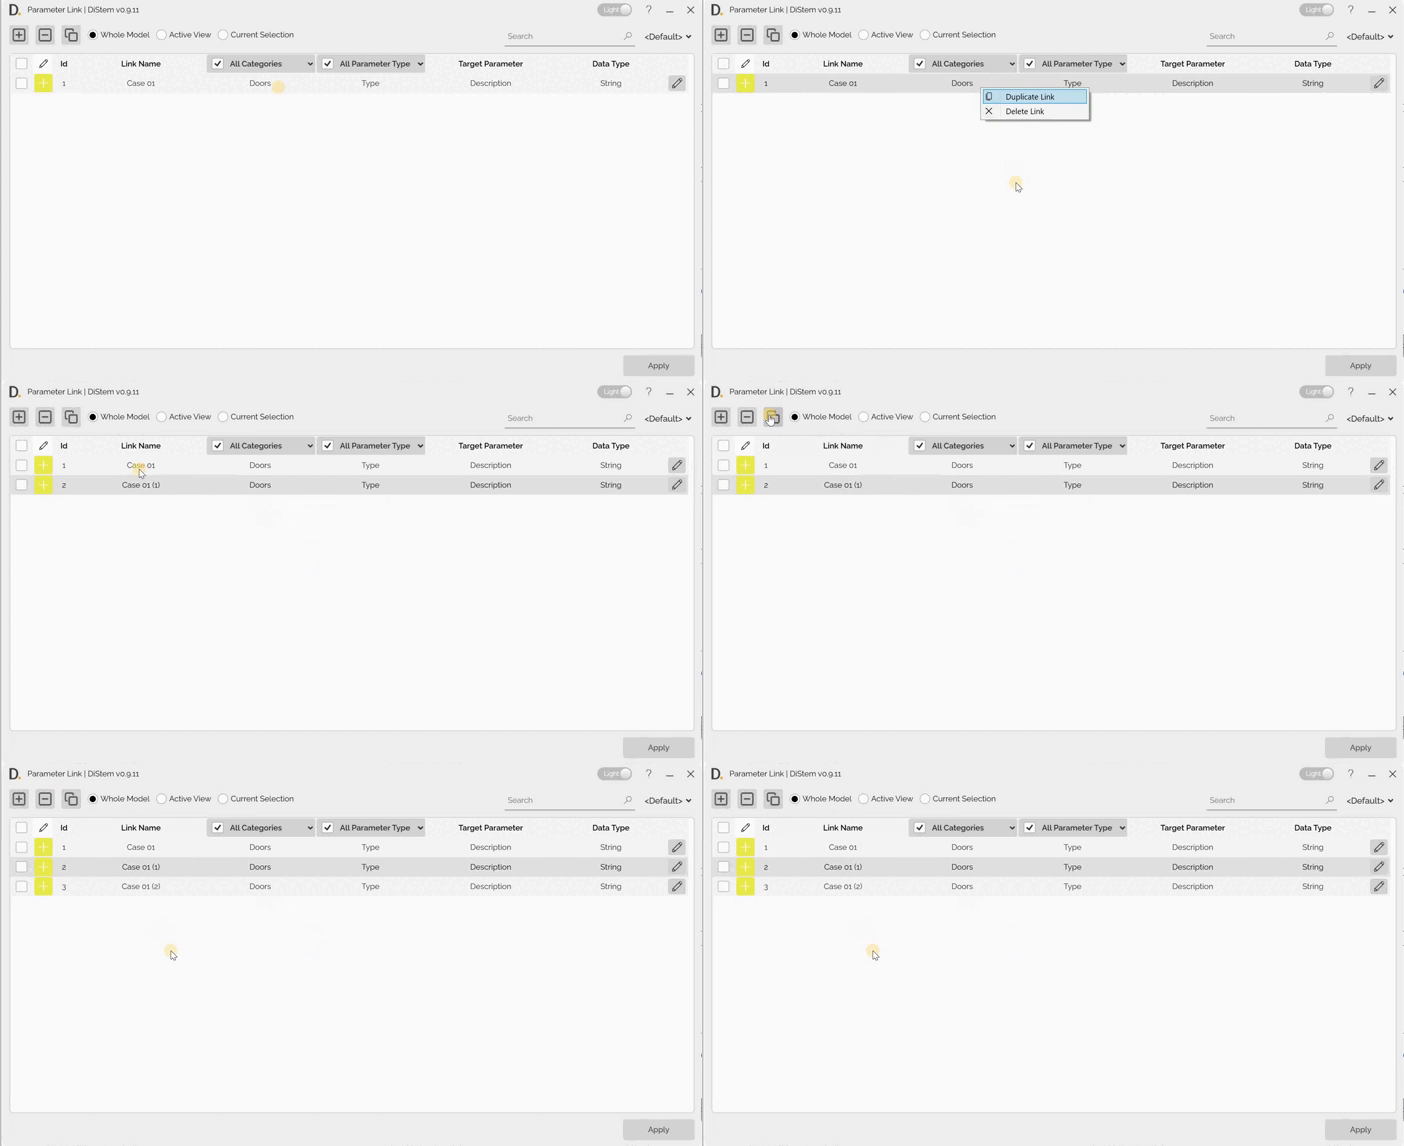
Note: the version on the image may not reflect the latest version.
Edit Link
On the Edit button in the last column of the Link to open the Link settings and change them if necessary.
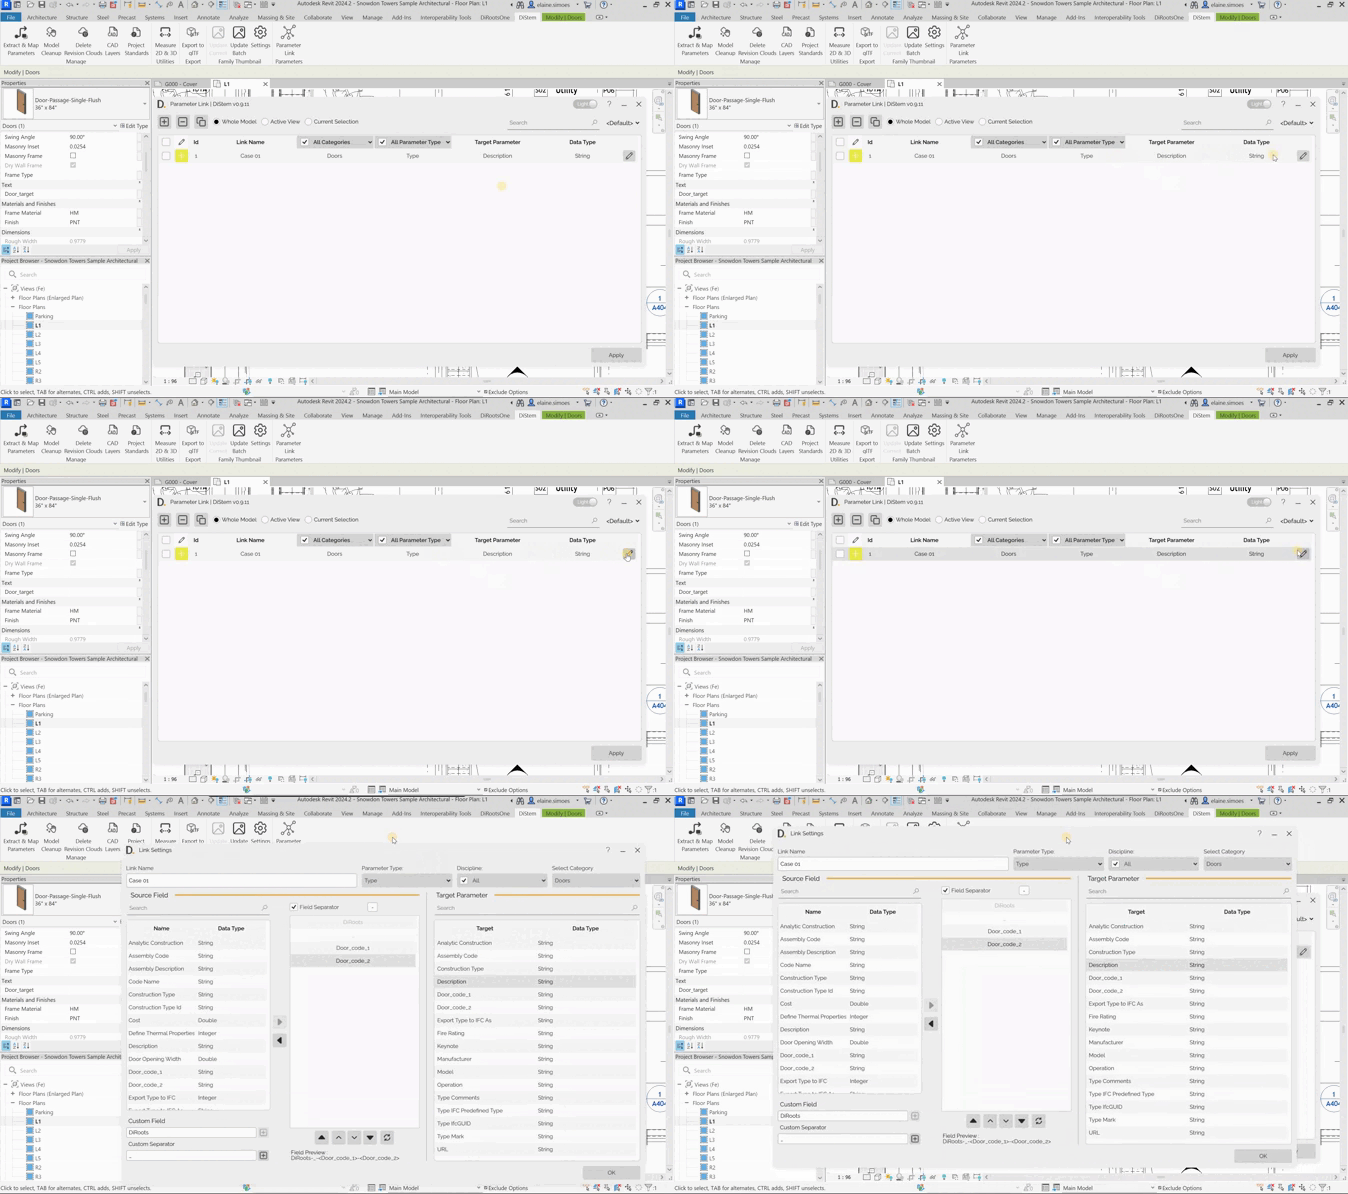
Note: the version on the image may not reflect the latest version.
Apply Link
Remember to define which elements you want to map before applying it. It can be applied to the Whole Model, only to elements in the Active View or only to Current Seclected elements. Use the radio button to select the desired option. The next step is to select the checkboxes to choose the links to apply the mapping.
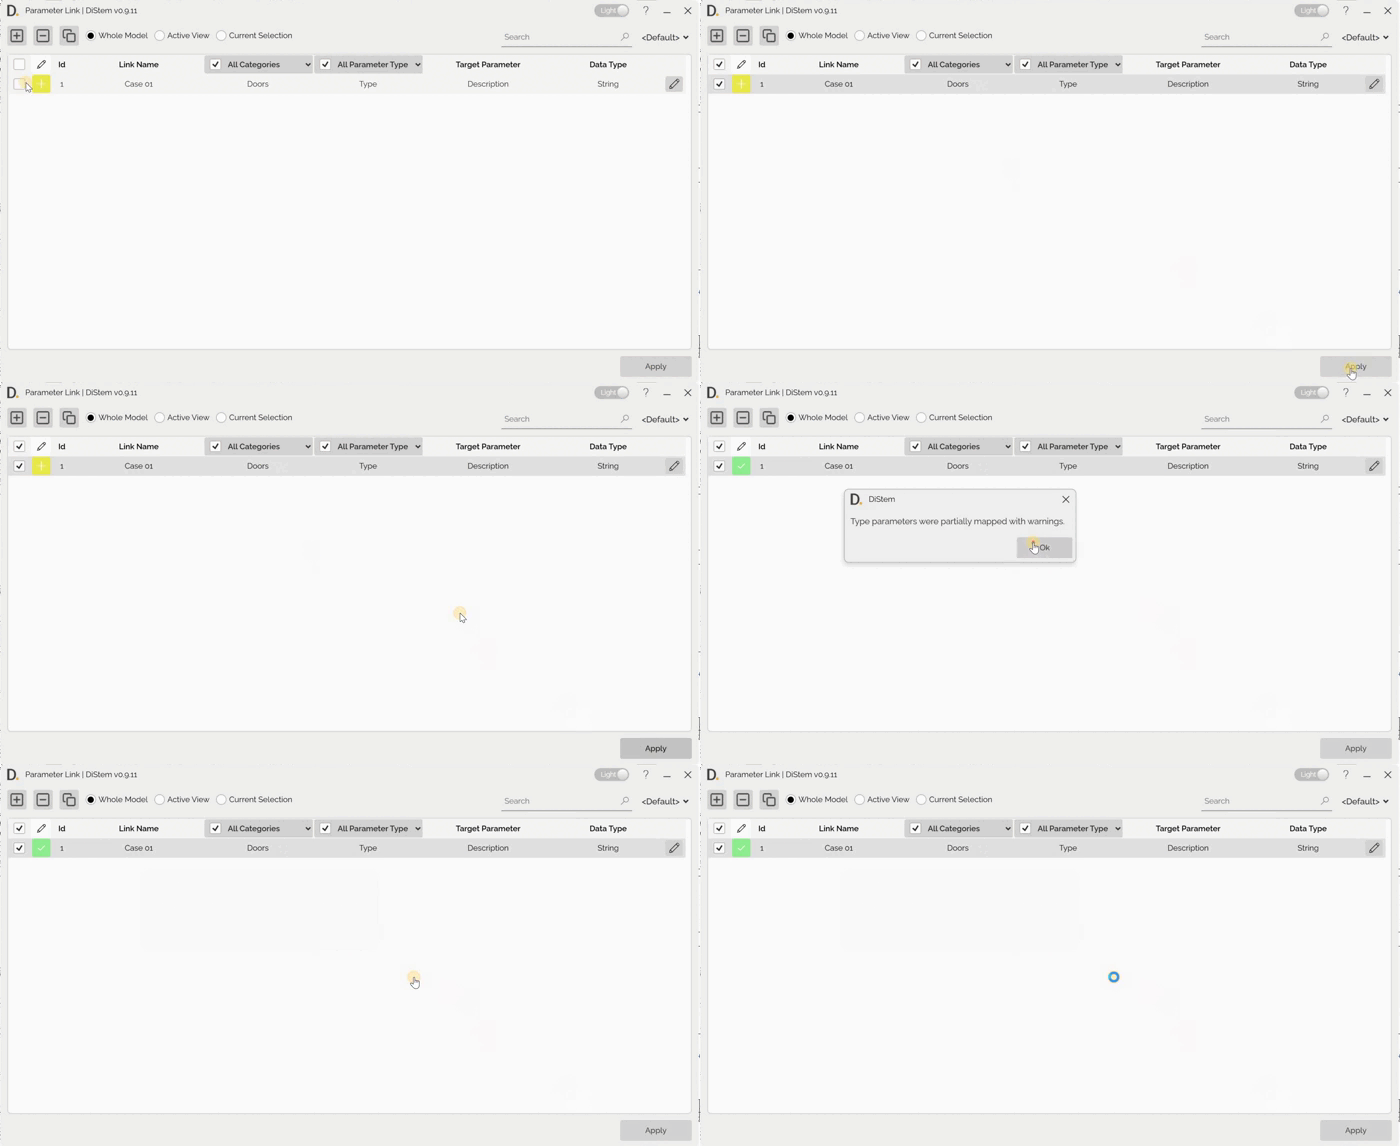
Note: the version on the image may not reflect the latest version.
Profiles
Be aware that when you close the plugin, you may lose the links you have created. To avoid this, save the profiles with the current links.
Create Profiles
The profiles feature make it easy to save your settings and reuse them later. It is also a handy way for BIM Managers to create standard rules and share them across the organization.
Steps:
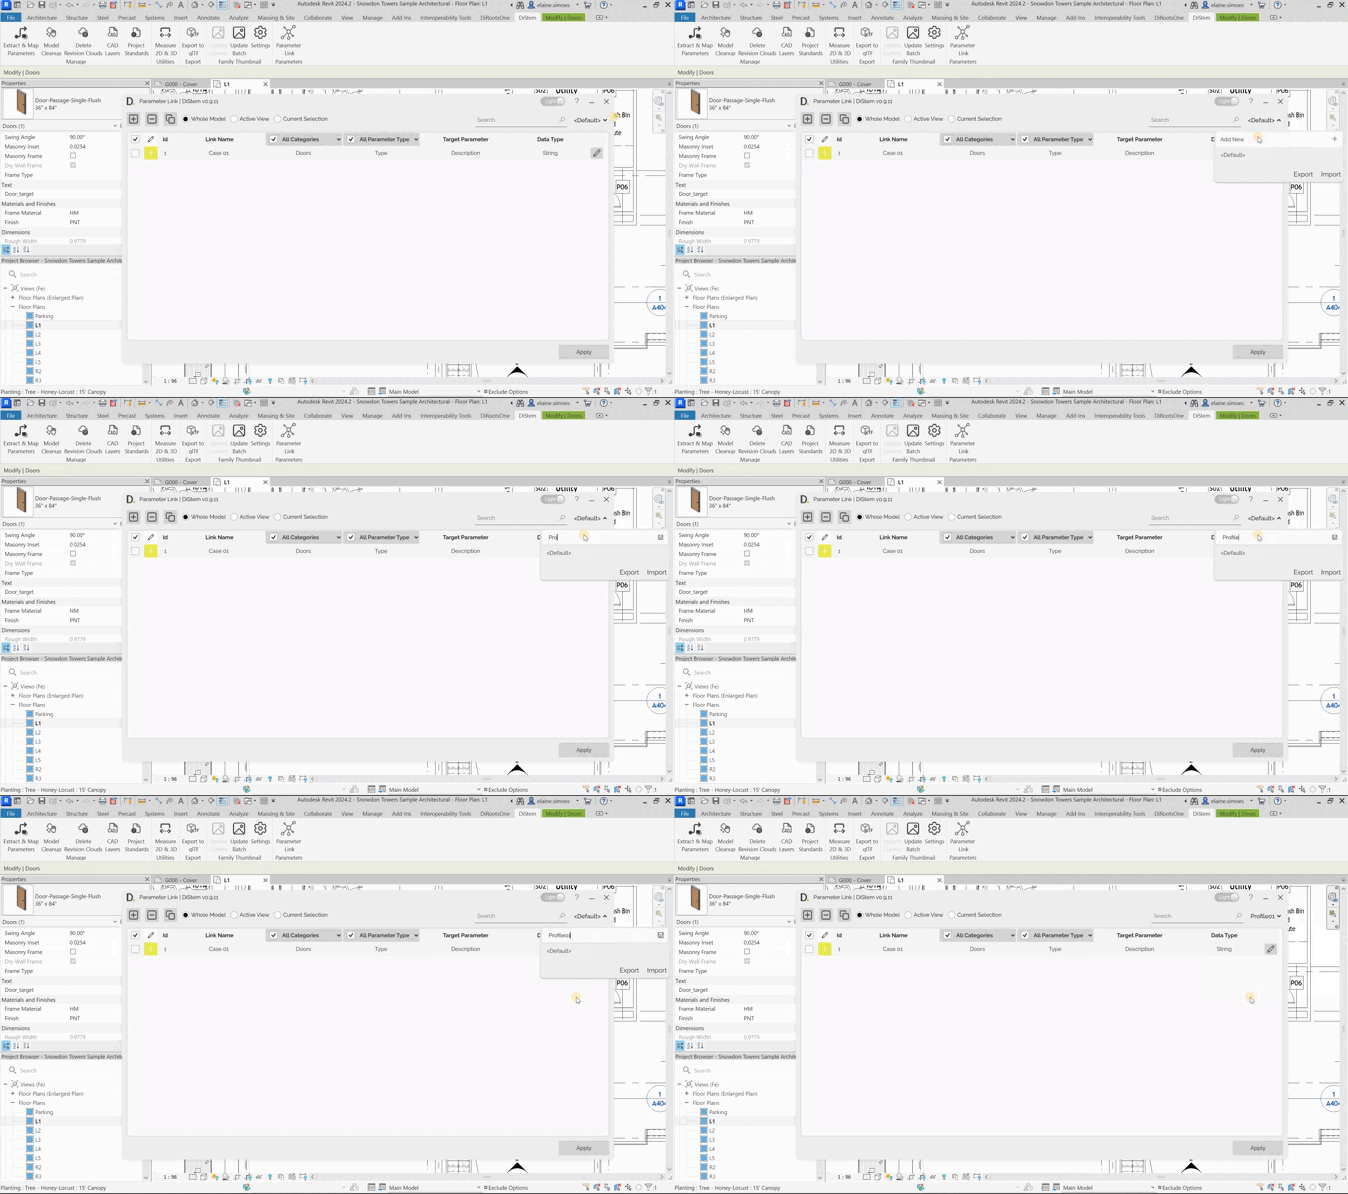
Note: the version on the image may not reflect the latest version of the application.
- Click on the top-right dropdown to open the profiles list.
- Click on the text input and name the profile (give it a meaningful name because this is the name that will show up in the profiles list)
- Click on the save button to save profile.
Import Profiles
The profiles feature make it easy to import existing profiles (e.g., profiles from a shared location).
Steps:
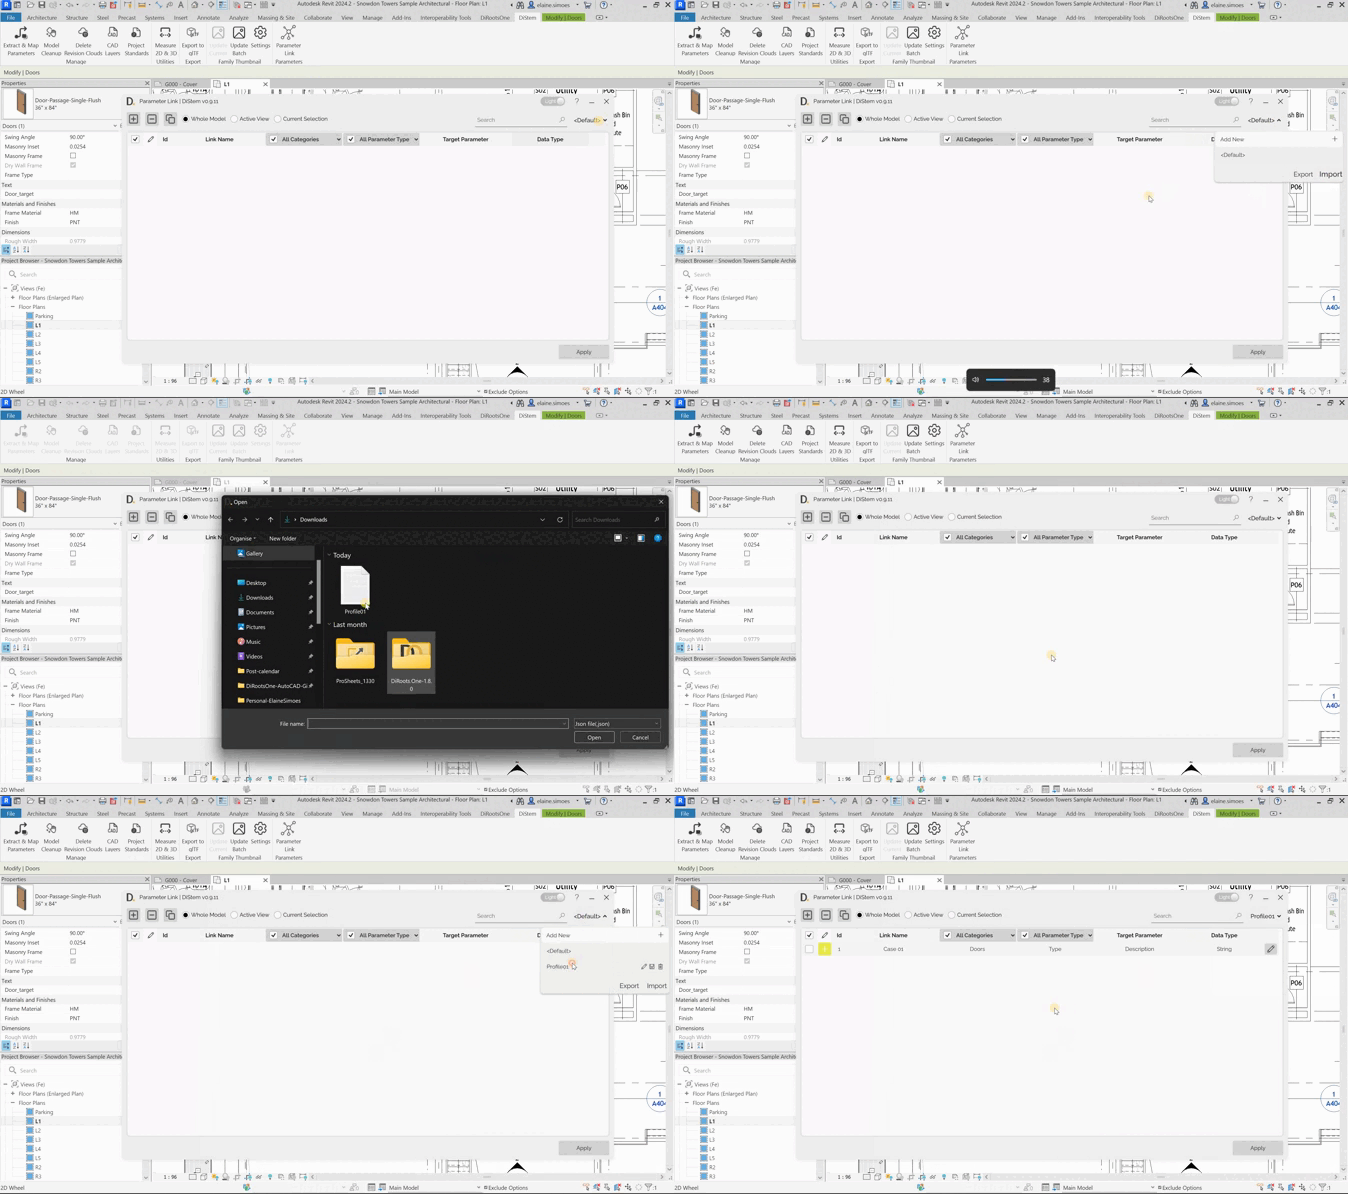
Note: the version on the image may not reflect the latest version of the application.
- Click on the top-right dropdown to open the profiles list.
- Click on the ‘Import’ button.
- Choose if you want to override the current list of profiles or if you want to append the profiles to your current list.
- Select the profiles file to be imported.
Export Profiles
The profiles feature make it easy to export your current list of profiles.
Steps:
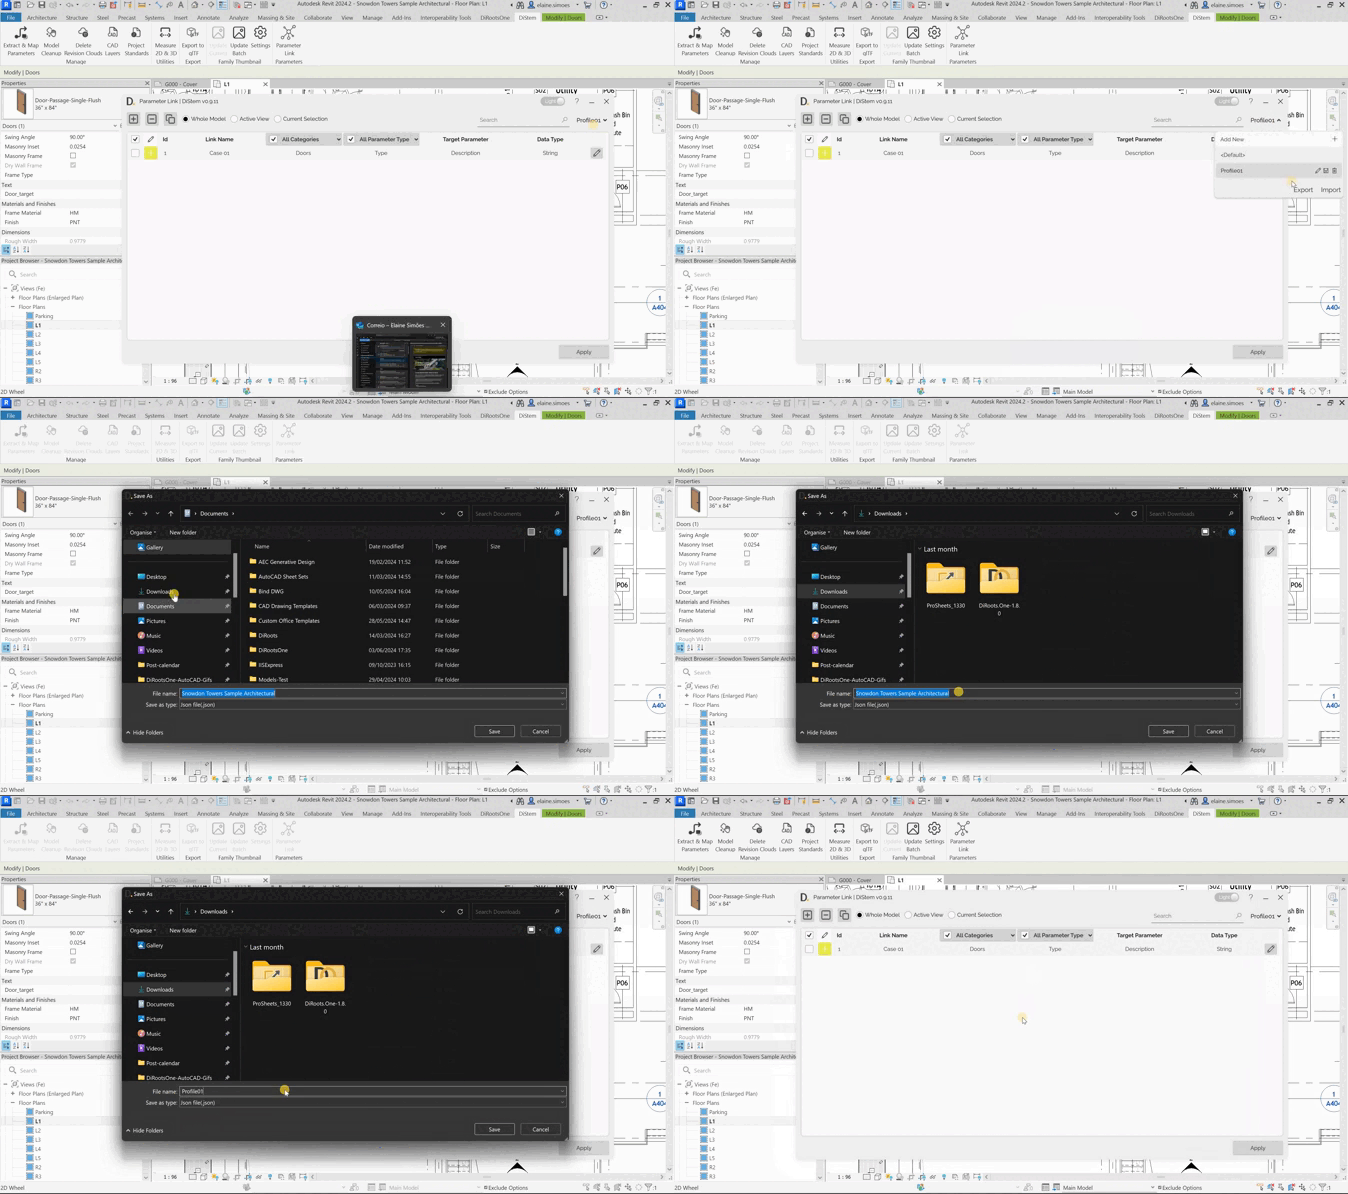
Note: the version on the image may not reflect the latest version of the application.
- Click on the top-right dropdown to open the profiles list.
- Click on the ‘Export’ button.
- Select the folder location and filename.
Delete Profiles
Steps:
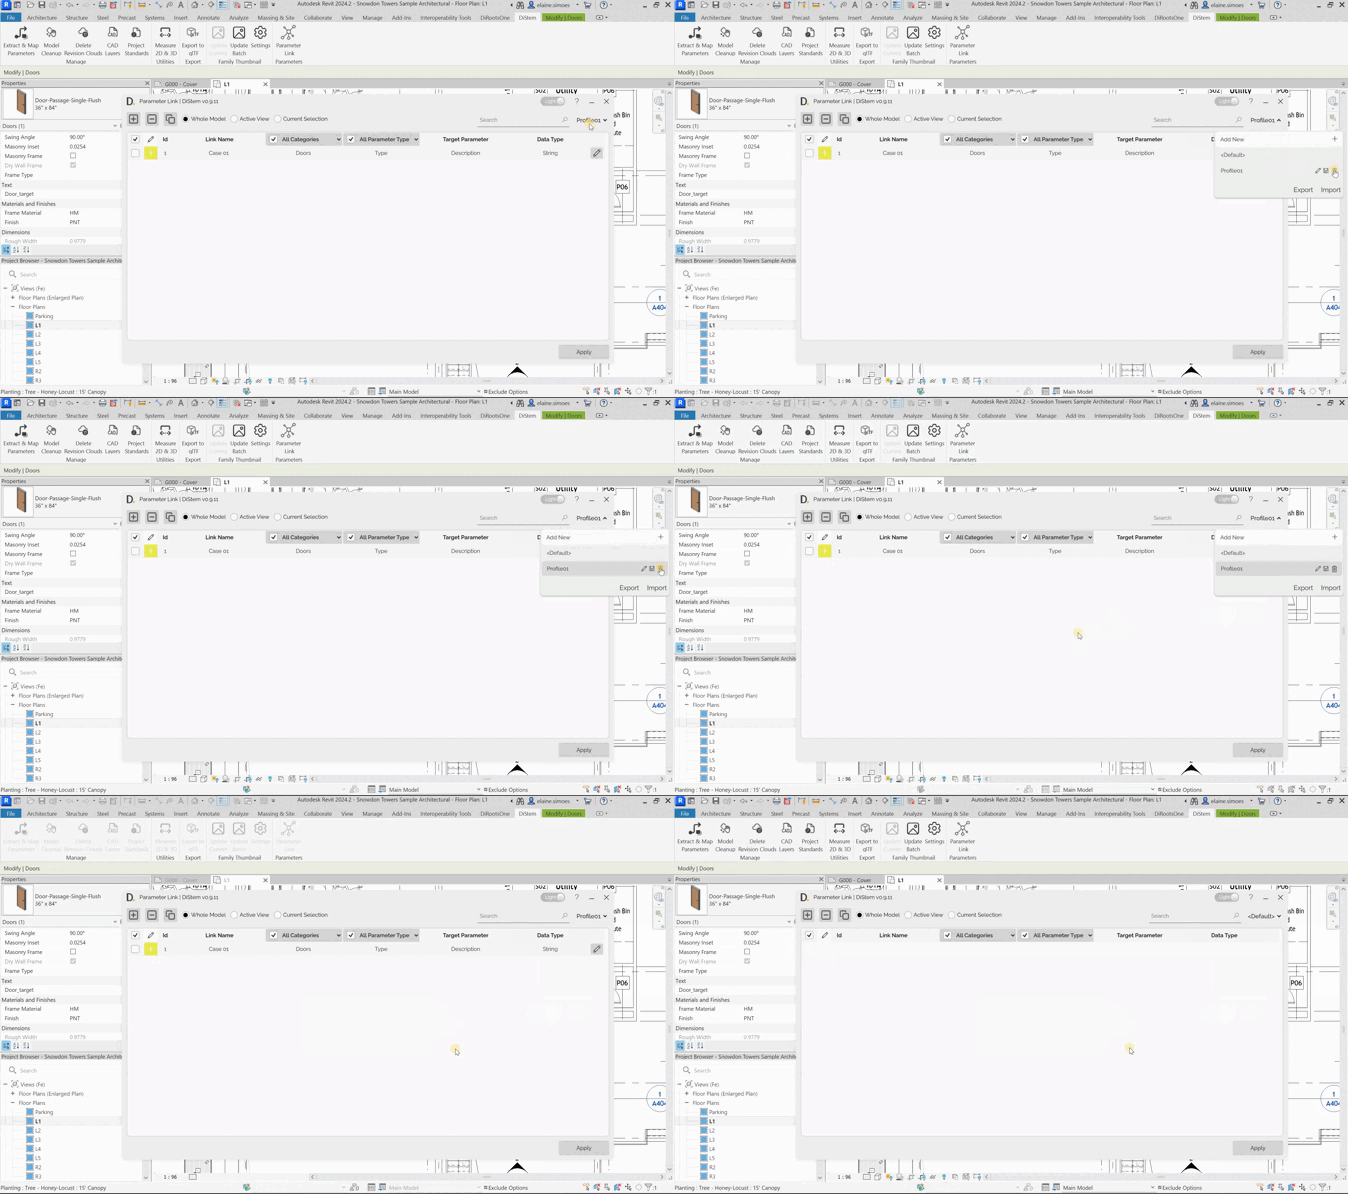
Note: the version on the image may not reflect the latest version of the application.
- Click on the top-right dropdown to open the profiles list.
- Click on the dustbin icon next to the profile you want to delete from the list.
- Click ‘Yes’ to confirm and delete the profile.
If you want to find out more about Parameter Link and explore detailed tutorials on how to use it, visit our YouTube channel. There, you’ll find a series of videos that can help answer questions and improve your knowledge. Be sure to check it out and subscribe to keep up to date with our news and tips!