
Family Thumbnail
The Family Thumbnail allows you to create thumbnails/preview images of multiple RFA files in a snap. You can also choose the perspectives, display style, and detail level to create the most eye-cathing previews. Plus, hide elements that clutter your visual representation for a crisp, clean look.
Core Features
- Create thumbnails/preview images of the current family or several families in batches.
- Customize the appearance by default or for each category.
- Customize the general settings for creating the thumbnails/preview images.
- Update the current family.
- Update several families in batch.
Table of contents
Settings
Firstly, it’s important to define the default settings for creating family thumbnails.
Appearance Settings
Default Appearance
These settings will be applied to all families. Set the Display Style and Detail Level for 3D and 2D families, and the View Type for 3D families.
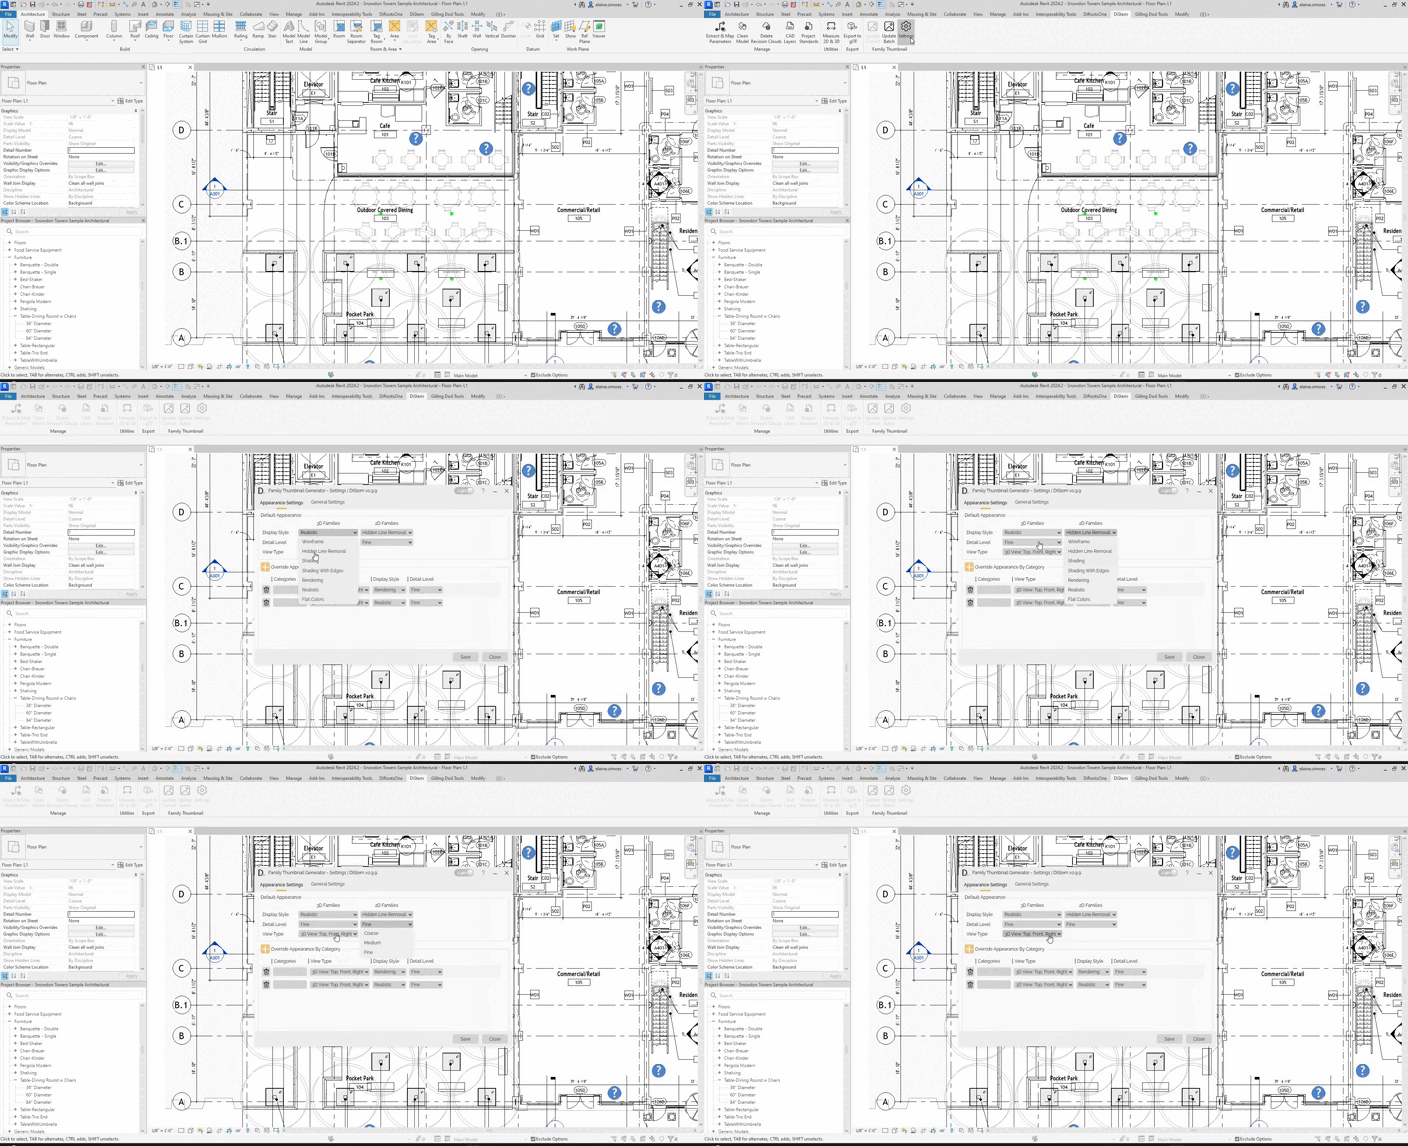
Note: the version on the image may not reflect the latest version.
Override Appearance By Category
This section allows you to create conditions by categories, to override the default appearance settings.
-
Click on Add new condition.
-
Click on the first box to select the categories. the categories available in the first table are displayed and you can move the categories you want to the Selected Categories table.
-
Choose the View type from the drop-down list.
-
Select the Display Style from the drop-down list.
-
The last step is to select the Detail level.
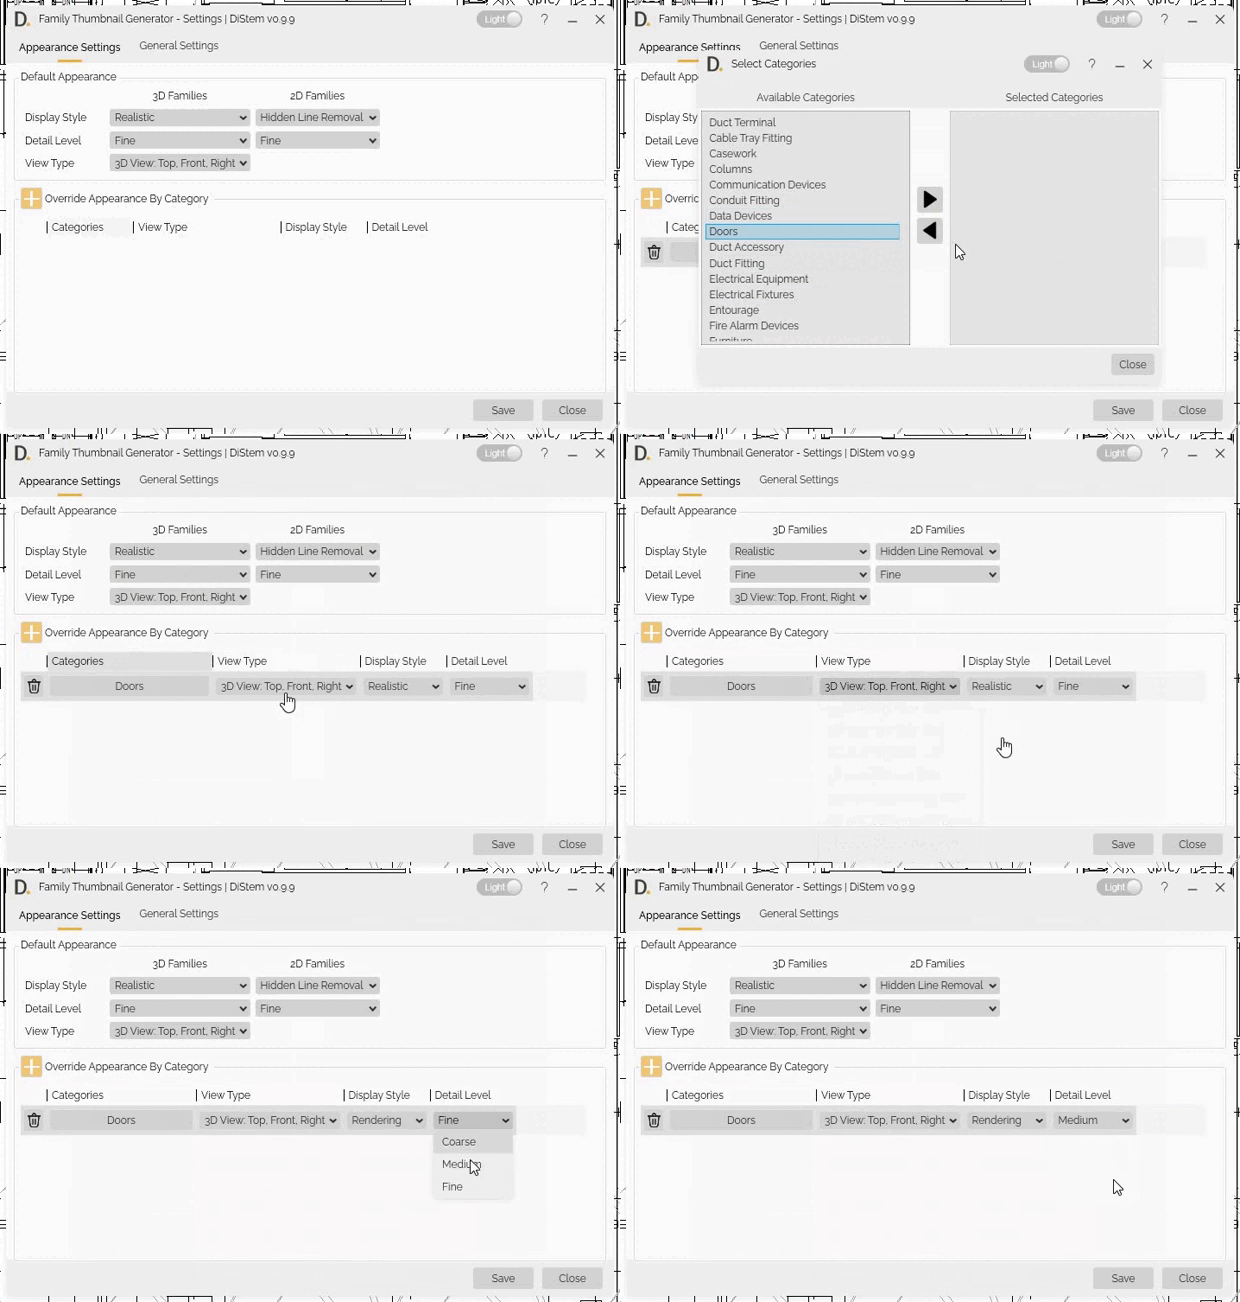
Note: the version on the image may not reflect the latest version.
General Settings
-
Enter a name for the Thumbnail View.
-
The next step is to check whether you want to export images, and whether you want to resize image to fit or keep 1:1 aspect ratio.
-
The last step is to select the settings you want to export.
Click the Save button to apply the settings.
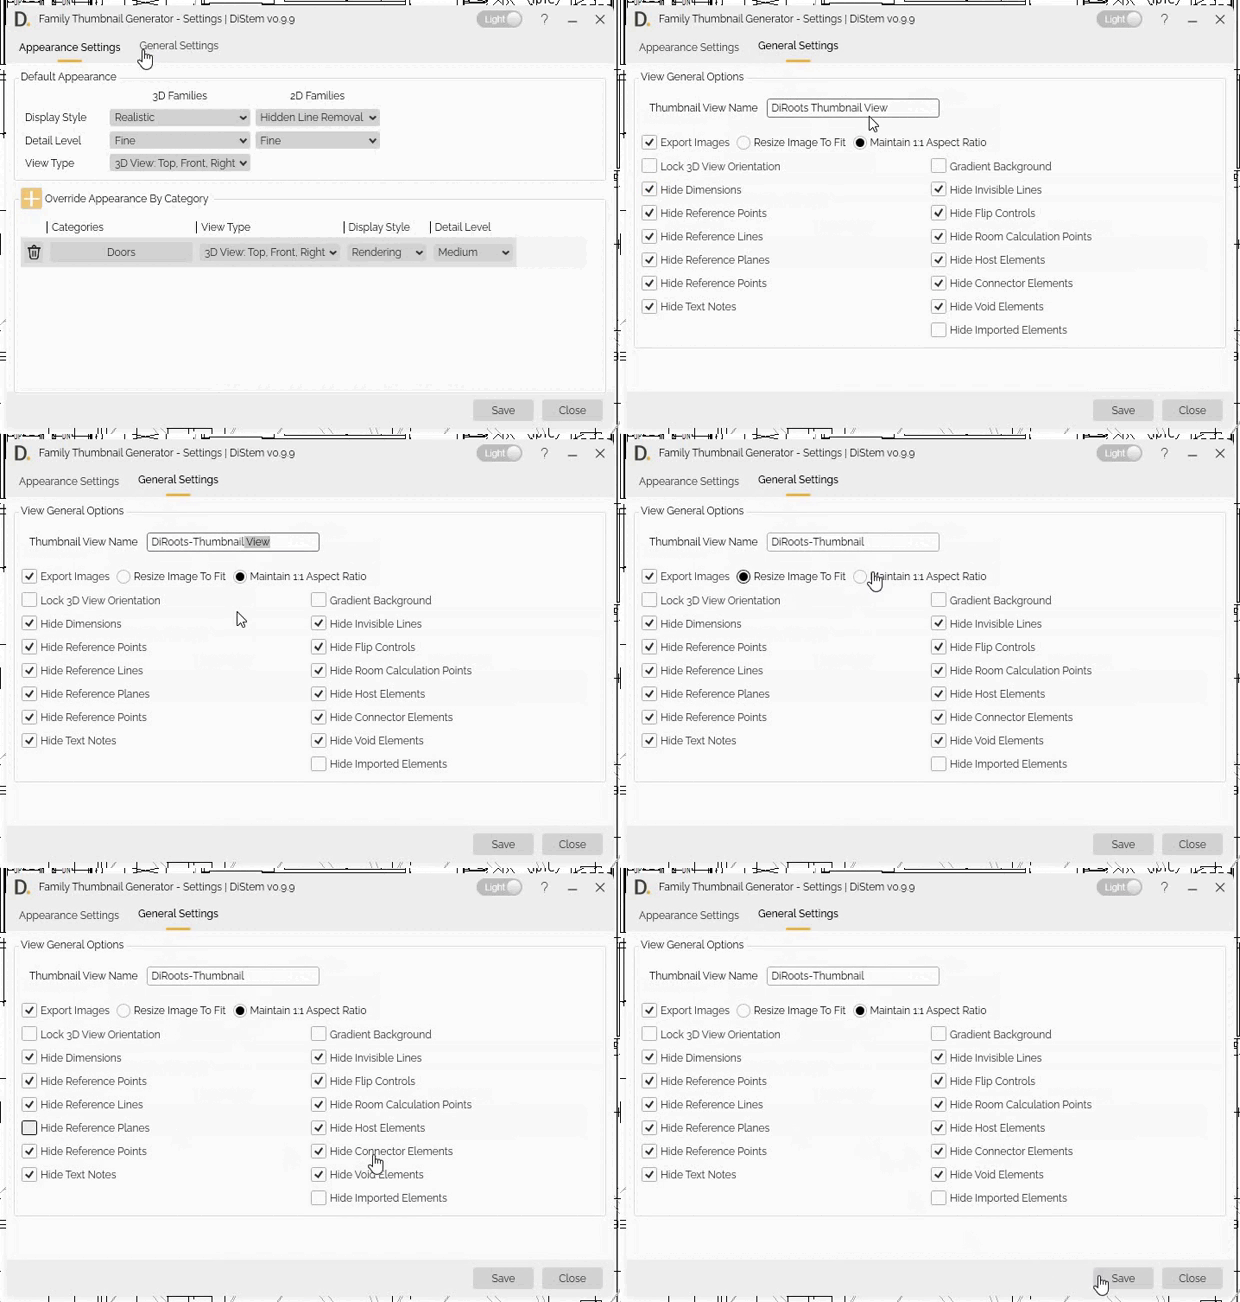
Note: the version on the image may not reflect the latest version.
Update Current
Open a family in the Family Editor mode, then open the DiStem tab and click to Update Current.
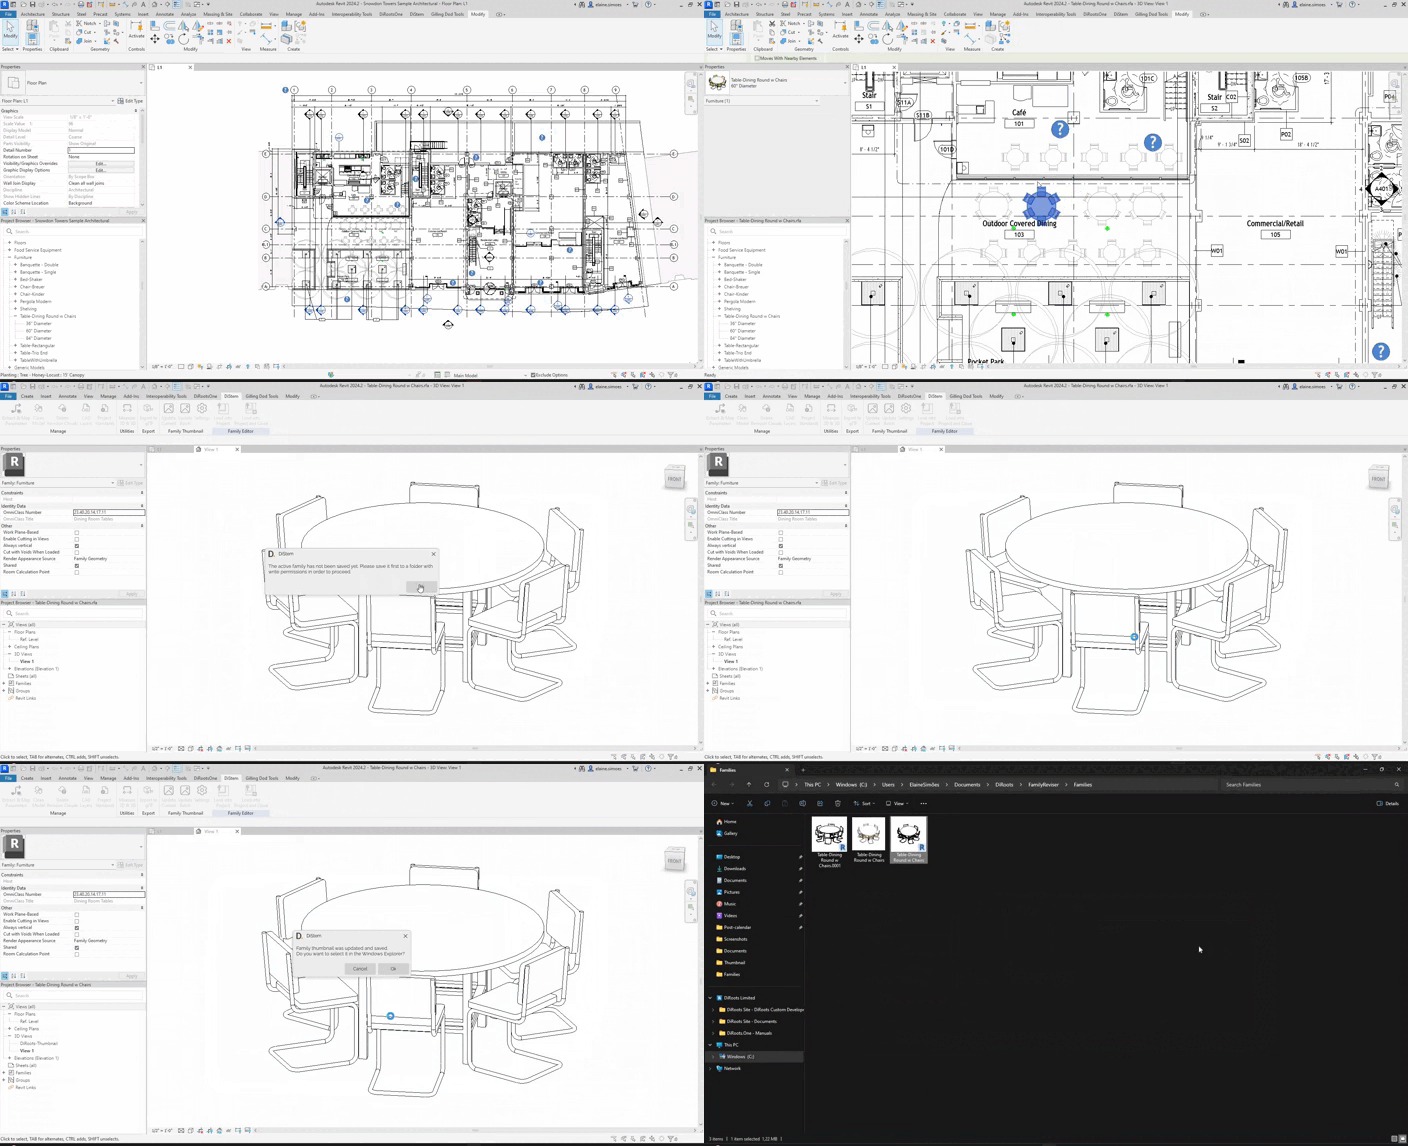
Note: the version on the image may not reflect the latest version.
Update Batch
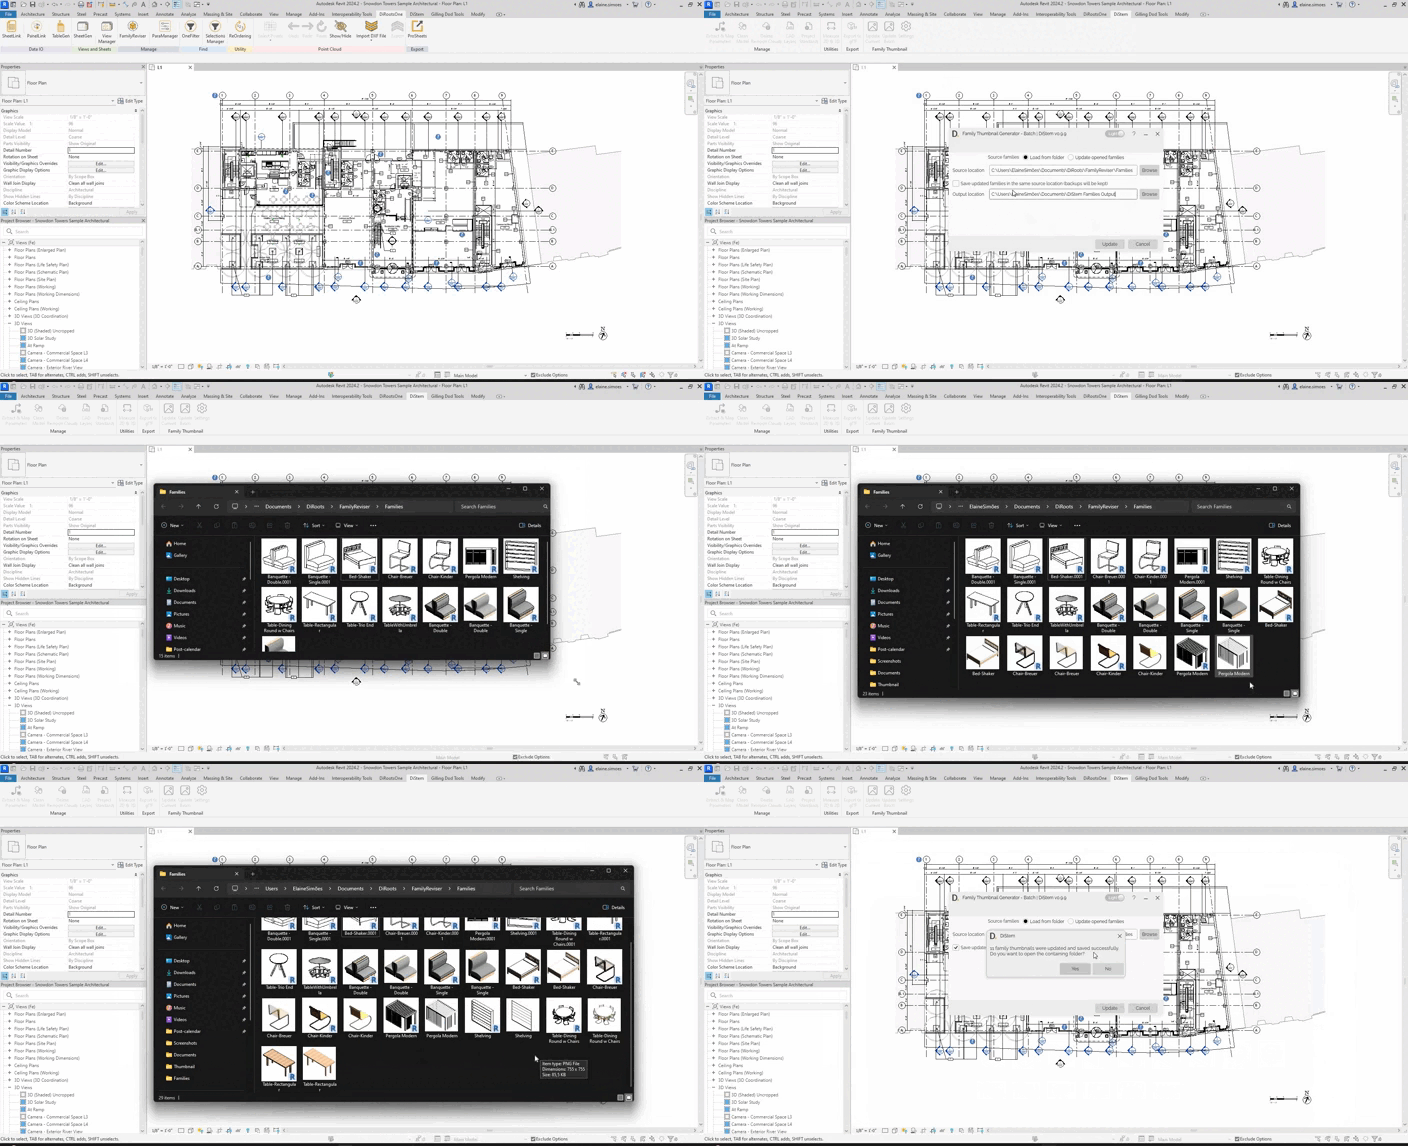
Click to update families in batches.
-
Source Families First, select whether you want to Load from folder or Update opened families.
-
If you choose to Load from folder, select the location of the source folder.
-
Select the Output Location.
#Note:
Select the checkbox to Save updated families in the same source location (backups will be kept).
When you select this option, you do not need to enter a location path.
Click on the Update button to start exporting the families.
Note: the version on the image may not reflect the latest version.